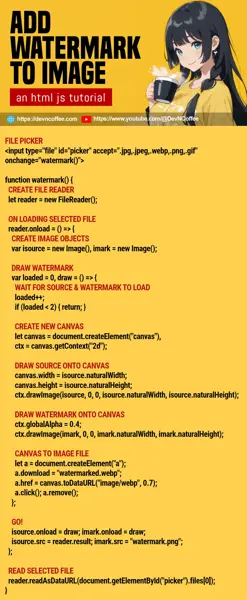
Want to add a watermark to an image? Yes, we can do that in modern Javascript, directly in the browser itself – There’s no need to upload the image. Let Master Coffee walk you through a few simple examples, let’s go!
CODE DOWNLOAD
I have released this under the MIT license, feel free to use it in your own project – Personal or commercial. Some form of credits will be nice though. 🙂
VIDEO TUTORIAL
1) TEXT WATERMARK
1-text.html
<!-- (PART A) FILE PICKER -->
<input type="file" id="picker" accept=".jpg,.jpeg,.webp,.png,.gif" onchange="watermark()">

<script>
function watermark() {
  // (PART B) CREATE FILE READER
  let reader = new FileReader();

  // (PART C) DRAW WATERMARK
  reader.onload = () => {
    // (C1) CREATE NEW IMAGE
    let img = new Image();

    // (C2) DRAW TEXT WATERMARK ON IMAGE LOAD
    img.onload = () => {
      // (C2-1) CREATE NEW CANVAS
      let canvas = document.createElement("canvas"),
      ctx = canvas.getContext("2d");

      // (C2-2) DRAW IMAGE ONTO CANVAS
      canvas.width = img.naturalWidth;
      canvas.height = img.naturalHeight;
      ctx.drawImage(img, 0, 0, img.naturalWidth, img.naturalHeight);

      // (C2-3) DRAW WATERMARK ONTO CANVAS
      ctx.font = "bold 46px Arial";
      ctx.fillStyle = "rgba(0, 0, 0, 0.5)";
      ctx.fillText("Coffee", 30, 100);

      // (C2-4) CANVAS TO IMAGE FILE
      let a = document.createElement("a");
      a.download = "watermarked.webp";
      a.href = canvas.toDataURL("image/webp", 0.7);
      a.click(); a.remove();
    };

    // (C3) GO!
    img.src = reader.result;
  };

  // (PART D) READ SELECTED FILE
  reader.readAsDataURL(document.getElementById("picker").files[0]);
}
</script>
To add a text watermark to the image, it is easier to trace in this order:
- (A) All we need for the HTML is a “regular file picker” that accepts images.
- (B & D) Create a
new FileReader()to read the selected file first. - (C1 & C3) On loading the selected file, create an image tag
<img src="SELECTED FILE">. - (C2) Draw the text watermark onto the image when loaded.
- (C2-1) The idea is to create a
<canvas>. - (C2-2 & C2-3) Draw the image onto the canvas, then “layer” the text on top.
- (C2-4) Force download the canvas as an image file. Create an
<a src="CANVAS" download="FILE NAME">anchor tag and click on it.
- (C2-1) The idea is to create a
2) IMAGE WATERMARK
2-image.html
<!-- (PART A) FILE PICKER -->
<input type="file" id="picker" accept=".jpg,.jpeg,.webp,.png,.gif" onchange="watermark()">

<script>
function watermark() {
  // (PART B) CREATE FILE READER
  let reader = new FileReader();

  // (PART C) ON LOADING SELECTED FILE
  reader.onload = () => {
    // (C1) CREATE IMAGE OBJECTS
    var isource = new Image(), imark = new Image();

    // (C2) DRAW WATERMARK
    var loaded = 0,
    draw = () => {
      // (C2-1) WAIT FOR SOURCE & WATERMARK TO LOAD
      loaded++;
      if (loaded < 2) { return; }

      // (C2-2) CREATE NEW CANVAS
      let canvas = document.createElement("canvas"),
      ctx = canvas.getContext("2d");

      // (C2-3) DRAW SOURCE ONTO CANVAS
      canvas.width = isource.naturalWidth;
      canvas.height = isource.naturalHeight;
      ctx.drawImage(isource, 0, 0, isource.naturalWidth, isource.naturalHeight);

      // (C2-4) DRAW WATERMARK ONTO CANVAS
      ctx.globalAlpha = 0.4;
      ctx.drawImage(imark, 0, 0, imark.naturalWidth, imark.naturalHeight);

      // (C2-5) CANVAS TO IMAGE FILE
      let a = document.createElement("a");
      a.download = "watermarked.webp";
      a.href = canvas.toDataURL("image/webp", 0.7);
      a.click(); a.remove();
    };

    // (C3) GO!
    isource.onload = draw;
    imark.onload = draw;
    isource.src = reader.result;
    imark.src = "watermark.png";
  };

  // (PART D) READ SELECTED FILE
  reader.readAsDataURL(document.getElementById("picker").files[0]);
}
</script>
Adding an image watermark is essentially the same, but we are now layering a watermark image on top of the source image.
- (A) Same as the previous example. We only need an HTML file picker to choose a source image, assuming that the watermark is kept on the server.
- (B & D) Same. Create a file reader to read the selected source image.
- (C1 & C3) The difference is that we have to load 2 images – The source image from the file picker, and the watermark image from the server.
- (C2-1) Use a
loadedflag to make sure that both images are loaded. - (C2-2) Same. Create a canvas to work with.
- (C2-3 & C2-4) Draw the source image first, then add the watermark on top.
- (C2-5) Force download the final image.
THE END – MORE IMAGE MAGIC
That’s all for this short tutorial and sharing. But how about “centering the watermark”? Resizing the image? Using a custom font? Follow up with my “other tutorials” for more:
CHEAT SHEET

