Once upon a time, a student asked “Master Coffee, I want to add background music to a website but it will not play”. I immediately gave a disguted look and said “that’s so outdated and 90s”. But as it turns out, it is a legit design consideration for a musician’s online portfolio.
Well, most beginners will just add an “invisible autoplay audio tag” for the BGM – <audio src="SONG.MP3" autoplay loop>. But that will most likely not work because of autoplay rules:
- Most browsers will not allow autoplay on page load.
- It will only be allowed if the user has specifically allowed it, or automatically after the user has allowed media to play on the website several times.
- Alternatively, autoplay will only start after the user has clicked on the page at least once.
TLDR – Play the BGM only after the user has clicked on the page at least once, OR check if autoplay is allowed on page load.
CODE DOWNLOAD
I have released this under the MIT license, feel free to use it in your own project – Personal or commercial. Some form of credits will be nice though. 🙂
VIDEO TUTORIAL
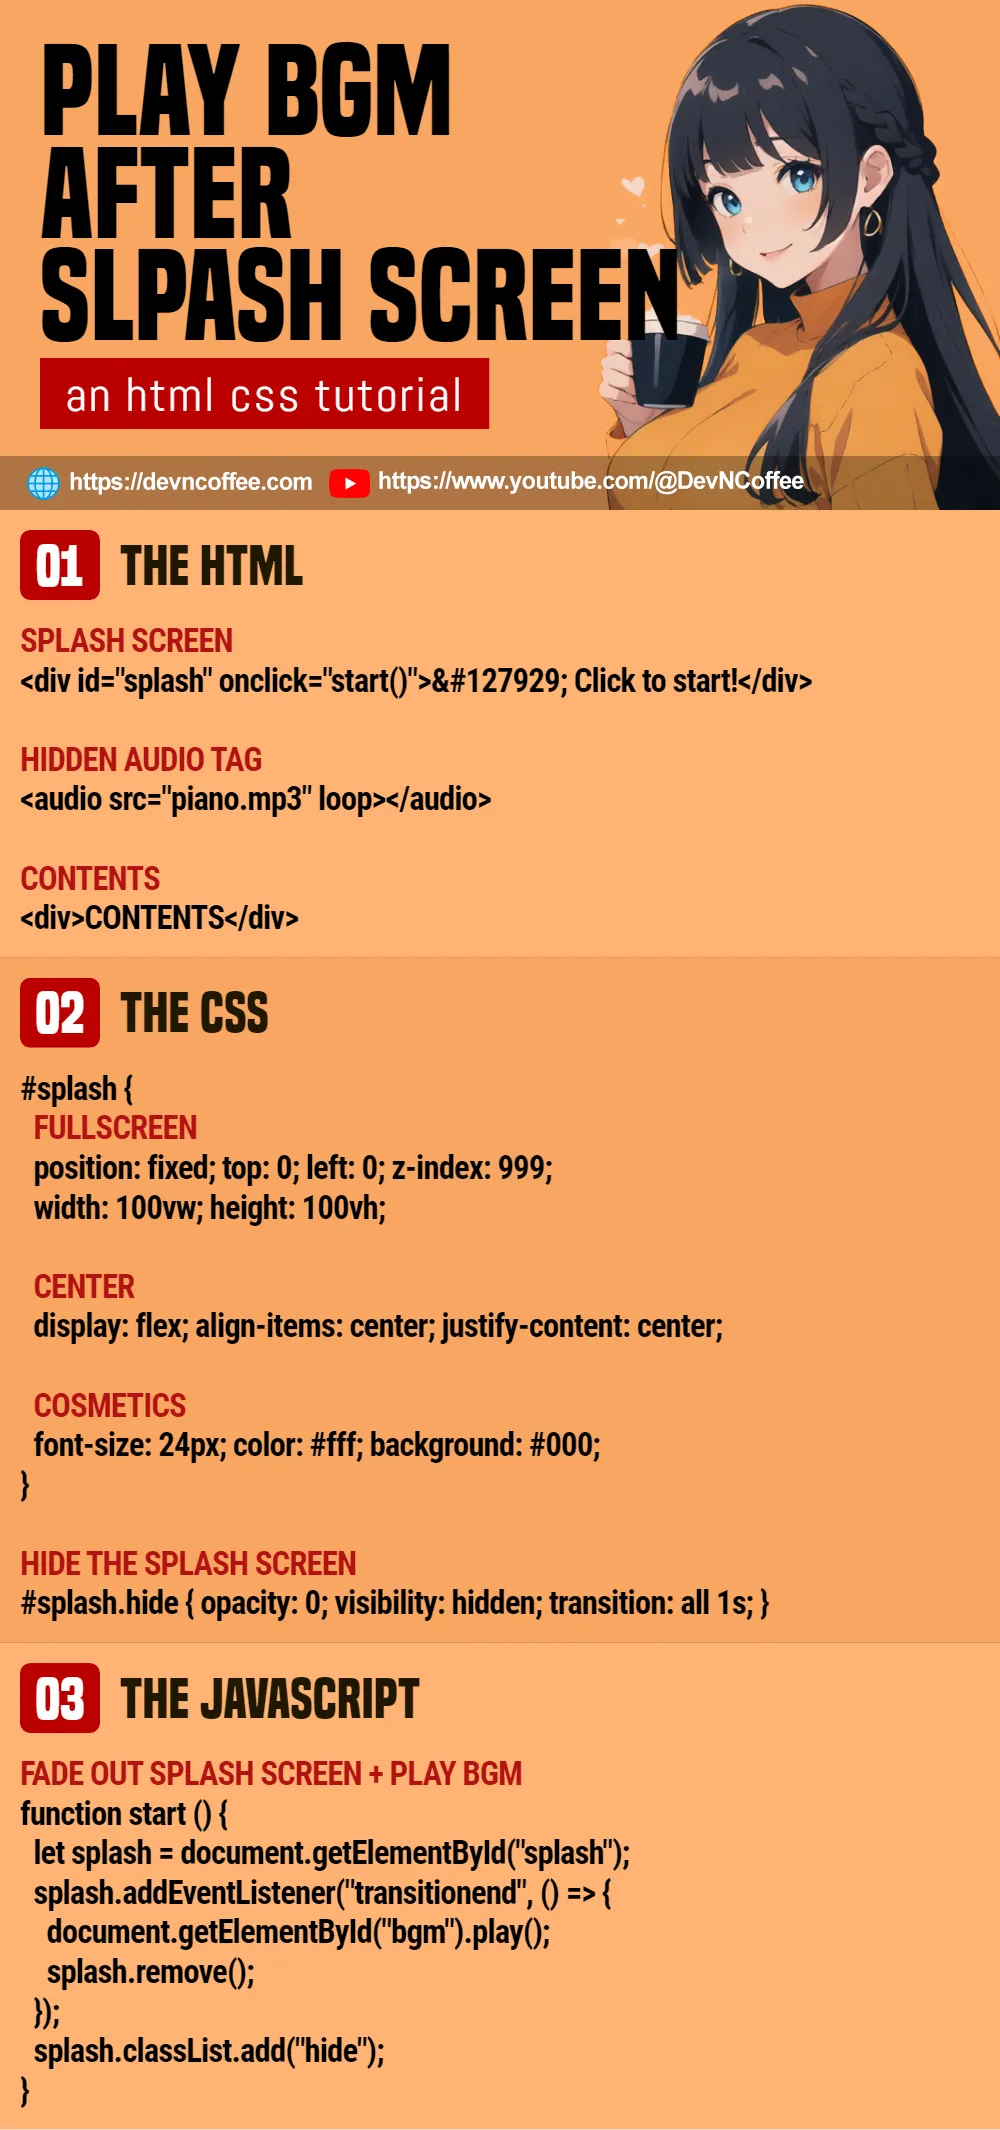
EXAMPLE 1) SPLASH SCREEN & PLAY BGM
1A) THE HTML
<!-- (PART A) SPLASH SCREEN -->
<div id="splash" onclick="start()">🎹 Click to start!</div>
<!-- (PART B) BGM -->
<audio id="bgm" src="piano.mp3" loop></audio>
<!-- (PART C) MAIN CONTENT -->
<h1>XYZ MUSICIAN</h1>
<p>Hear me roar!</p>If the user must click on the page at least once for the BGM to play, then we can at least make it “look natural”. One possible way is to add a splash screen.
<div id="splash">Full page splash screen.<audio id="bgm">A “hidden audio player”. Take note, autoplay is not enabled.(PART C)The rest of the page.
P.S. I don’t quite like this method though. It obscures the “main content” and is not really good for SEO.
1B) THE CSS
/* (PART A) SPLASH SCREEN */
#splash {
  /* (A1) FULLSCREEN */
  position: fixed; top: 0; left: 0; z-index: 999;
  width: 100vw; height: 100vh;

  /* (A2) CENTER */
  display: flex;
  align-items: center; justify-content: center;

  /* (A3) COSMETICS */
  font-size: 24px;
  color: #fff; background: #000;
}

/* (A4) TO HIDE THE SPLASH SCREEN */
#splash.hide {
  opacity: 0; visibility: hidden;
  transition: all 1s;
}
Long story short –
#splashFullscreen splash page.#splash.hideTo hide the splash page with fade out effect.
1C) THE JAVASCRIPT
function start () {
  // (PART A) GET SPLASH SCREEN
  let splash = document.getElementById("splash");

  // (PART B) PLAY BGM & REMOVE SPLASH SCREEN AFTER FADE IN
  splash.addEventListener("transitionend", () => {
    document.getElementById("bgm").play();
    splash.remove();
  });

  // (PART C) GO!
  splash.classList.add("hide");
}
When the user clicks on the splash screen, start() takes over. Pretty self-explanatory:
PART CFade out the splash screen.PART A & BAfter fading out, start the BGM and remove the splash screen.
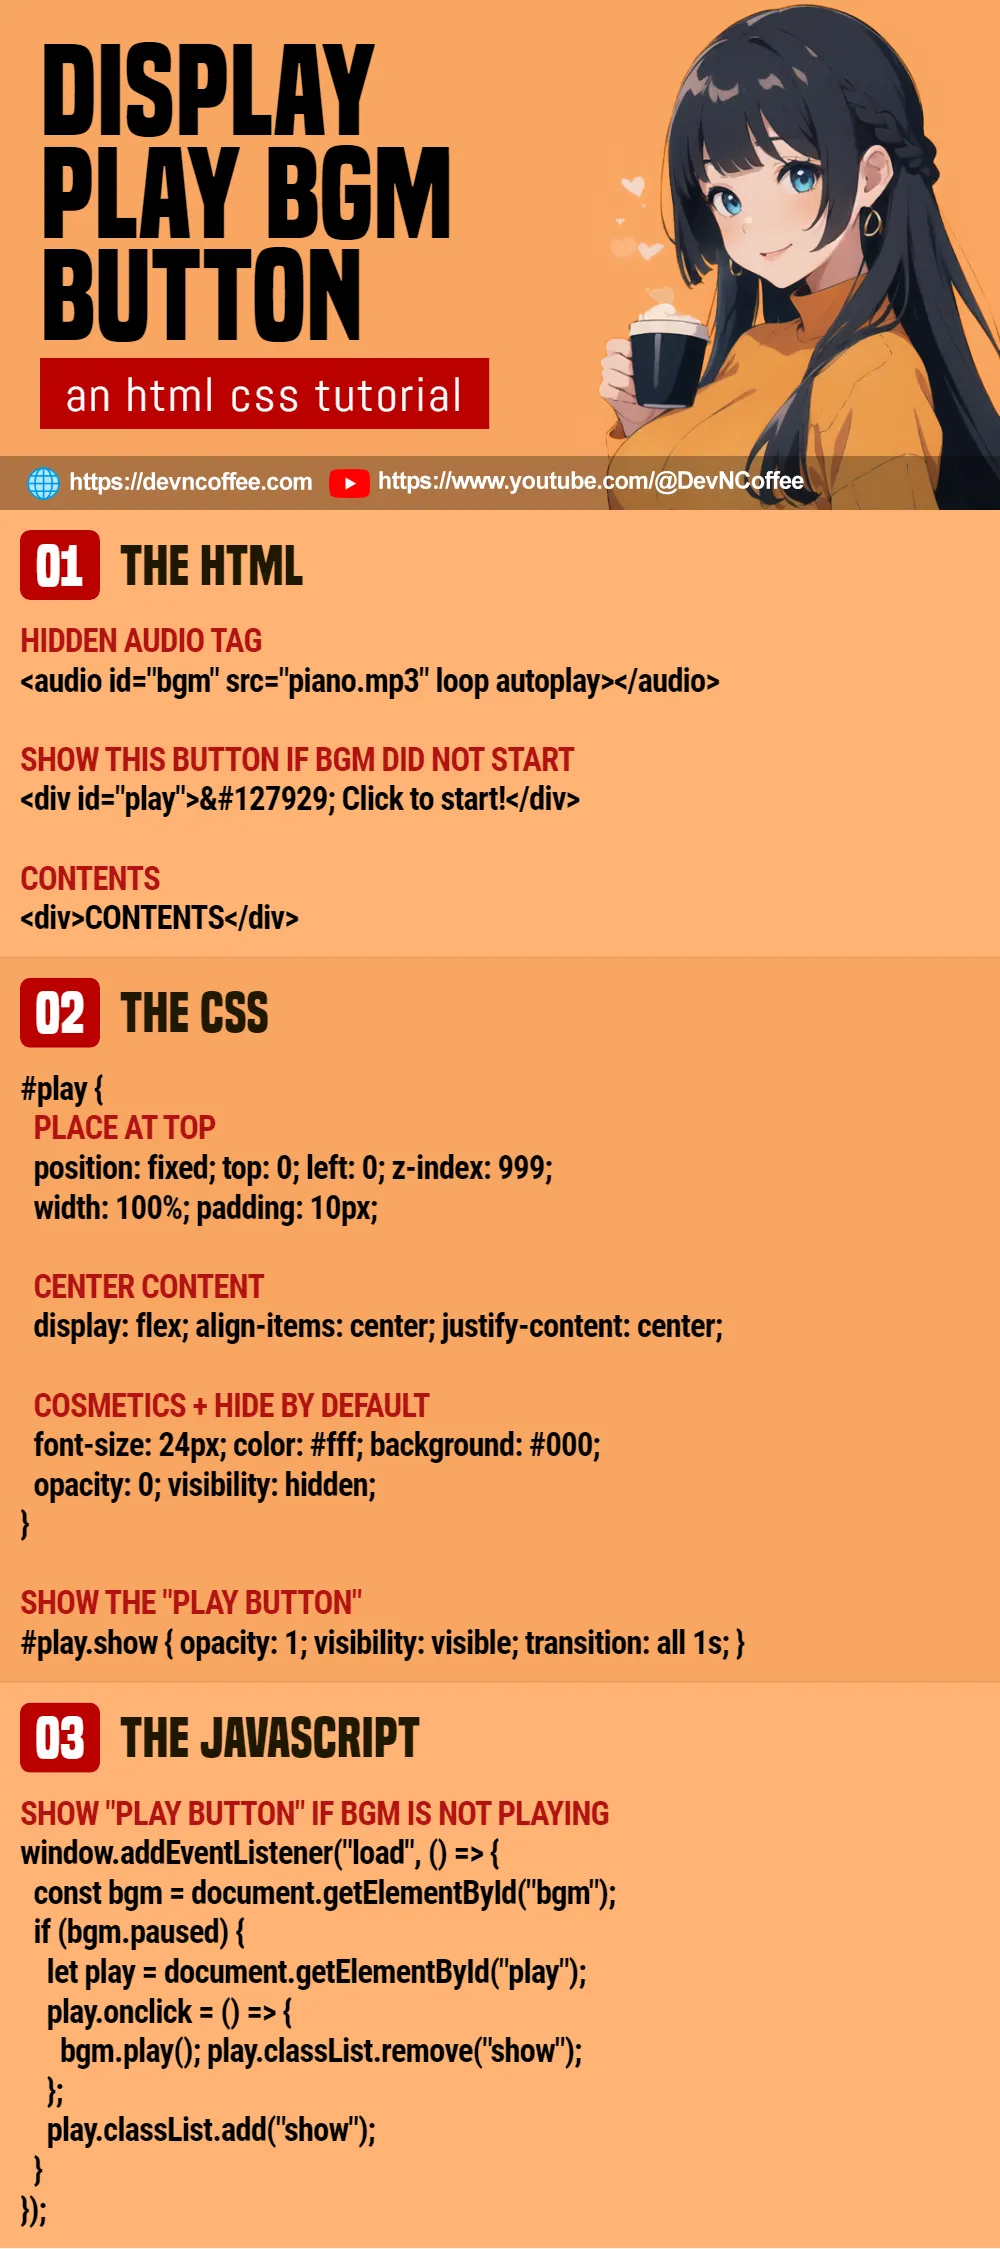
EXAMPLE 2) CHECK FOR AUTOPLAY PERMISSION
2A) THE HTML
<!-- (PART A) BGM -->
<audio id="bgm" src="piano.mp3" loop autoplay></audio>
<!-- (PART B) PLAY -->
<div id="play">
🎹 Click to start!
</div>
<!-- (PART C) MAIN CONTENT -->
<h1>XYZ MUSICIAN</h1>
<p>Hear me roar!</p>This is an alternative design that I prefer:
<audio id="bgm">Hidden audio player, as usual. Take note, autoplay is enabled.<div id="play">A “play BGM” button. We will show this only when autoplay fails.(PART C)Main content.
2B) THE CSS
/* (PART A) "PLAY BUTTON" */
#play {
  /* (A1) PLACE AT TOP */
  position: fixed; top: 0; left: 0; z-index: 999;
  width: 100%; padding: 10px;

  /* (A2) CENTER */
  display: flex;
  align-items: center; justify-content: center;

  /* (A3) HIDE */
  opacity: 0; visibility: hidden;

  /* (A4) COSMETICS */
  font-size: 24px;
  color: #fff; background: #000;
}

/* (A5) SHOW THE "PLAY BUTTON" */
#play.show {
  opacity: 1; visibility: visible;
  transition: all 1s;
}#playThe “play button” does not obscure the page now. This will float on top of the page, feel free to redesign and place it whever you like.#play.showAlso, the “play button” is hidden by default. This CSS class will display it with a fade-in effect.
2C) THE JAVASCRIPT
window.addEventListener("load", () => {
  // (PART A) GET BGM
  const bgm = document.getElementById("bgm");

  // (PART B) AUTOPLAY NOT ALLOWED - SHOW "PLAY BUTTON"
  if (bgm.paused) {
    // (B1) GET "PLAY BUTTON"
    let play = document.getElementById("play");

    // (B2) CLICK TO PLAY
    play.onclick = () => {
      bgm.play();
      play.classList.remove("show");
    };

    // (B3) SHOW "PLAY BUTTON"
    play.classList.add("show");
  }
});
PART A & BOn window load, we check if autoplay is allowed.PART B1 & B2If autoplay is not allowed, we set the “play button” to play the BGM on click.PART B3Display the “play button”.
THE END – A FEW MORE NOTES ON AUTOPLAY
That’s all for this short tutorial, and I hope it has helped you. Just a few more small notes regarding autoplay and videos before we end:
- Even after if the user clicks on the page, autoplay may still “not work”.
- Two more “autoplay factors” are the user’s Internet connection and security settings; If the user explicitly disabled autoplay, it will not start no matter what you do.
- In a way, it is better to create visible audio players. Let users control and decide what they want to do –
<audio src="MY.MP3" controls>. - Video autoplay is slightly different. We can set a video to autoplay on page load but it must be muted –
<video src="VID.MP4" autoplay muted>.
CHEAT SHEET