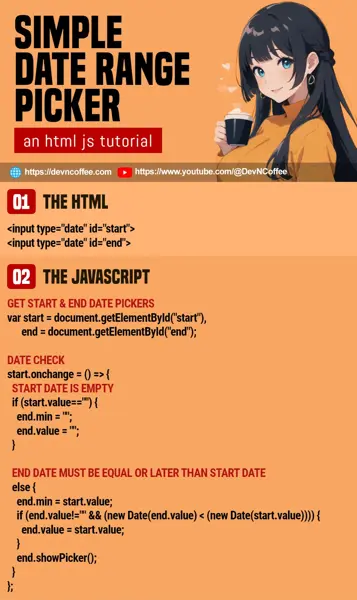
Once upon a time, a student loaded an entire library to put a “date range widget” onto a simple form. The justification was “native HTML does not have a date range picker”… Master Coffee couldn’t help but shake his head.
Isn’t a date range picker just two date pickers with “the end date must be equal or after the start date”? Isn’t 20 lines of Javascript code simpler than an entire library? Let Master Coffee show you an example. Let’s go!
CODE DOWNLOAD
I have released this under the MIT license, feel free to use it in your own project – Personal or commercial. Some form of credits will be nice though. 🙂
VIDEO TUTORIAL
DATE RANGE PICKER DEMO
PART 1) THE HTML
<form>
  <input type="date" id="start" required>
  <input type="date" id="end" required>
</form>
As promised, no funky HTML. Just 2 “regular date pickers” for the start and end date.
PART 2) THE JAVASCRIPT
window.addEventListener("load", () => {
  // (PART A) GET START & END DATE PICKERS
  var start = document.getElementById("start"),
      end = document.getElementById("end");

  // (PART B) DATE CHECK
  start.onchange = () => {
    // (B1) START DATE IS EMPTY
    if (start.value=="") {
      end.min = "";
      end.value = "";
    }

    // (B2) END DATE MUST BE EQUAL OR LATER THAN START DATE
    else {
      end.min = start.value;
      if (end.value!="" && (new Date(end.value) < (new Date(start.value)))) {
        end.value = start.value;
      }
      end.showPicker();
    }
  };
});- On window load, get the start and end date pickers.
- When the user changes the start date, we “react” accordingly.
- (B1) If the start date is invalid or empty, we “empty and reset” the end date as well.
- (B2) If the start date is valid, the minimum end date must be equal to the start date. Also, automatically open the end-date picker for convenience.
EXTRA) MULTIPLE DATE RANGE PICKERS
For the beginners who are thinking “What about multiple date range pickers”:
- Insert as many start/end date pickers as required.
- Set the
idin alphabetical order –startA/endA startB/endB startC/endC - Modify the above example into a function, call it on window load.
function ranger (suffix) {
  // (PART A) GET START & END DATE PICKERS
  var start = document.getElementById("start" + suffix),
      end = document.getElementById("end" + suffix);

  // (PART B) DATE CHECK
  start.onchange = () => {
    // (B1) START DATE IS EMPTY
    if (start.value=="") {
      end.min = "";
      end.value = "";
    }

    // (B2) END DATE MUST BE EQUAL OR LATER THAN START DATE
    else {
      end.min = start.value;
      if (end.value!="" && (new Date(end.value) < (new Date(start.value)))) {
        end.value = start.value;
      }
      end.showPicker();
    }
  };
}

// (PART C) START!
window.addEventListener("load", () => {
  ranger("A");
  ranger("B");
  ...
});
THE END – DATE RANGE RESTRICTIONS
That’s all for this quick tutorial and sharing. Here are a few more extras for the newbies who skipped the basics…
- To restrict the date range, set
min="YYYY-MM-DD"on the start date andmax="YYYY-MM-DD"on the end date. - At the time of writing, it is impossible to set “start on Monday” and “restrict certain dates”.
- Although limited, it is possible to play around with
stepto “restrict certain days”. - Don’t be lazy and check out the date picker documentation.
CHEAT SHEET

