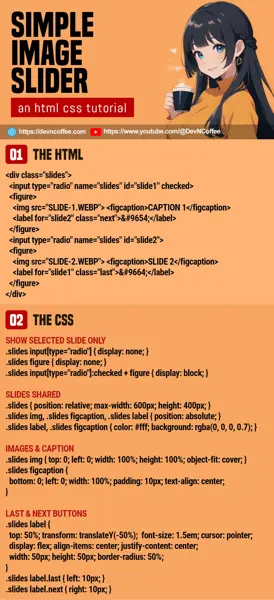
Once upon a time, a student went into a deep trance while studying an image slider. He then mumbled something about “no Javascript no trouble”. Well, it is possible to create an image slider using only pure HTML CSS. Let us walk through an example, and you will see why it is not exactly easier – It’s a hassle and a restriction instead. Let’s go!
CODE DOWNLOAD
I have released this under the MIT license, feel free to use it in your own project – Personal or commercial. Some form of credits will be nice though. 🙂
VIDEO TUTORIAL
IMAGE SLIDER DEMO
Sorry, there’s no “auto scroll” for this demo. Click on the last/next button manually. Also, it’s responsive – Go ahead, resize the window and see how it resizes itself to fit.
PART 1) IMAGE SLIDER HTML
<!-- (PART A) SLIDES -->
<div class="slides">
<!-- (A1) SLIDE 1 -->
<input type="radio" name="slides" id="slide1" checked>
<figure>
<img src="slide-1.webp">
<figcaption>Hot Coffee</figcaption>
<label for="slide2" class="next">▶</label>
</figure>
<!-- (A2) SLIDE 2 -->
<input type="radio" name="slides" id="slide2">
<figure>
<img src="slide-2.webp">
<figcaption>Iced Coffee</figcaption>
<label for="slide1" class="last">◀</label>
<label for="slide3" class="next">▶</label>
</figure>
<!-- (A3) SLIDE 3 -->
<input type="radio" name="slides" id="slide3">
<figure>
<img src="slide-3.webp">
<figcaption>Canned Coffee</figcaption>
<label for="slide2" class="last">◀</label>
</figure>
</div>Beginners, keep calm and drink coffee. Let us summarize what is happening here:
- The “entire widget” is contained within
<div class="slides">. - Every slide is a collection of
<figure><img><figcaption>. - Take note that we have a radio button before every slide –
<input type="radio" name="slides">. - Lastly, every slide has a
<label for="slideN">that acts as a last/next slide button.
PART 2) SLIDER CSS – ONLY SHOW THE SELECTED SLIDE
/* (PART A) SHOW SELECTED SLIDE ONLY */
.slides input[type="radio"] { display: none; }
.slides figure {
  visibility: hidden; opacity: 0;
  transition: all 0.5s;
}
.slides input[type="radio"]:checked + figure {
  visibility: visible; opacity: 1;
}
This is the only “functional part” of the CSS.
- Hide all the radio buttons, they will still work when we click on the corresponding label.
- Hide all the slides.
- Only show the slide when the corresponding radio button is checked.
PART 3) SLIDER CSS – COSMETICS
/* (PART B) SLIDES WRAPPER & SHARED */
.slides {
  position: relative;
  max-width: 600px; height: 400px;
}
.slides img, .slides figcaption, .slides label {
  position: absolute;
}
.slides label, .slides figcaption {
  color: #fff; background: rgba(0, 0, 0, 0.7);
}

/* (PART C) SLIDE IMAGES */
.slides img {
  top: 0; left: 0;
  width: 100%; height: 100%; object-fit: cover;
}

/* (PART D) SLIDE CAPTION */
.slides figcaption {
  bottom: 0; left: 0;
  width: 100%; padding: 10px; text-align: center;
}

/* (PART E) LAST & NEXT BUTTONS */
.slides label {
  top: 50%; transform: translateY(-50%);
  display: flex; align-items: center; justify-content: center;
  width: 50px; height: 50px; border-radius: 50%;
  font-size: 1.5em; cursor: pointer;
}
.slides label.last { left: 10px; }
.slides label.next { right: 10px; }
The rest of the CSS is pretty much cosmetics.
- (B) Dimensions of the “widget” itself. Also, shared styles for the images, captions, and “last/next buttons”.
- (C) Set the slide images to cover the container.
- (D) Place the slide caption at the bottom.
- (E) Set the position of the last/next buttons.
Feel free to style the image slider however you wish.
THE END – AUTOSCROLL & RESTRICTIONS
That’s all for this quick tutorial. For those who want to “auto rotate the slide every N seconds” – Yes, it is possible with CSS animation. But again, CSS cannot change the checked status of the radio buttons… How are you going to deal with that? If you want manual controls, you cannot have auto-scroll. If you have auto-scroll, you cannot have manual controls.
This is why Master Coffee says it’s a restriction without Javascript. Dealing with multiple slides is also a hassle, you have to add checkboxes and labels to every slide. So if you are not allergic to Javascript – Check out my Javascript image slideshow tutorial.
CHEAT SHEET


