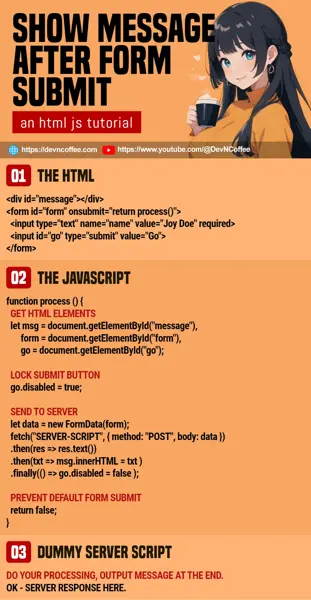
So you are trying to show a message after submitting an HTML form? First, a quick reminder that HTML forms will reload the page after submission. Thus, it’s a manner of reworking your submission process:
- Add an empty container to display the message in your HTML form.
- On submission, process the form on the server side and output a message.
- Pass the message back into the HTML form.
How is this done exactly? There are 2 common ways to do it – Let Master Coffee walk you through simple examples. Let’s go.
CODE DOWNLOAD
I have released this under the MIT license, feel free to use it in your own project – Personal or commercial. Some form of credits will be nice though. 🙂
VIDEO TUTORIAL
METHOD 1) PASS SERVER-SIDE MESSAGE TO HTML
<?php
// (PART A) PROCESS FORM WHEN SUBMITTED
if (isset($_POST["name"])) {
  // DO YOUR PROCESS AS USUAL
  echo "<div class='message'>OK</div>";
}
?>

<!-- (PART B) SHOW HTML FORM -->
<form method="post" target="_self">
  <input type="text" name="name" value="Jon Doe" required>
  <input type="submit" value="Go">
</form>
This snippet is in PHP, but the process should be similar across all other server-side languages.
- (B) Create the HTML form, and set it to submit to the same page.
- (A) Process the form on submission, and output the message.
METHOD 2) SUBMIT WITH FETCH
2A) THE HTML
<!-- (PART A) HTML FORM -->
<div id="message"></div>
<form id="form" onsubmit="return process()">
  <input type="text" name="name" value="Joy Doe" required>
  <input id="go" type="submit" value="Go">
</form>
The same old HTML form. But take note, we are using Javascript to process the form now – onsubmit="return process()".
2B) THE JAVASCRIPT
// (PART B) PROCESS FORM SUBMIT
function process () {
  // (B1) GET HTML ELEMENTS
  let msg = document.getElementById("message"),
      form = document.getElementById("form"),
      go = document.getElementById("go");

  // (B2) LOCK SUBMIT BUTTON
  go.disabled = true;

  // (B3) GET FORM DATA
  let data = new FormData(form);

  // (B4) SEND TO SERVER
  fetch("2C-server.txt", { method: "POST", body: data })
  .then(res => res.text())
  .then(txt => msg.innerHTML = txt )
  .finally(() => go.disabled = false );

  // (B5) PREVENT DEFAULT FORM SUBMIT
  return false;
}
Some beginners may find this a little intimidating, but it’s very straightforward nonetheless. Upon submitting the form:
- (B1) Get all the HTML elements – The message, form, and submit button.
- (B2) To prevent multiple submissions, lock/disable the submit button.
- (B3) Get the form data.
- (B4) Submit the form to the server using
fetch().- Yep, this is just a “regular POST submission”.
- Return the server response as text, and place it into the message container.
- Lastly, re-enable the submit button.
- (B5) Return false to prevent the form from submitting and reloading the page.
EXTRA) SUBMIT VIA GET
If you want to submit the form with get, just do a quick 2 line change:
let url = "2C-server.txt?" + new URLSearchParams(data).toString();fetch(url)
2C) DUMMY SERVER-SIDE SCRIPT
OK - SERVER RESPONSEThis is a dummy – You do the processing on the server side as required, in whatever language you have adopted. Just remember to output the message at the end of the script.
THE END – FETCH IS NOT TROUBLESOME
That’s all for this quick tutorial and sharing. But before we end, let me address the possible haters who think “Javascript is so confusing and troublesome”. There’s a good reason why fetch exists.
- Fetch is asynchronous, it is non-blocking.
- That is, the web app is still “usable” while the form submission happens in the background.
- Simple example – Fetch makes more sense for a shopping cart. Imagine reloading the page every time an item is added to the cart, versus “add item while you continue to shop”.
That said, both of the above methods are “correct”. Just use whichever that makes sense for your project.
CHEAT SHEET

