Once upon a time, a student loaded a “tags input widget” and an entire library for a simple form… It works, but Master Coffee cannot help but be sad. There’s really no need to introduce so much loading bloat for a “tags input box”, here’s how to create one in pure HTML Javascript – Let’s go!
CODE DOWNLOAD
I have released this under the MIT license, feel free to use it in your own project – Personal or commercial. Some form of credits will be nice though. 🙂
VIDEO TUTORIAL
TAGS INPUT DEMO
Enter a tag into the text box above, press enter or comma to add it. Click on an existing tag to remove it. Tags will be case-insensitive (all lower case) and duplicates are not allowed.
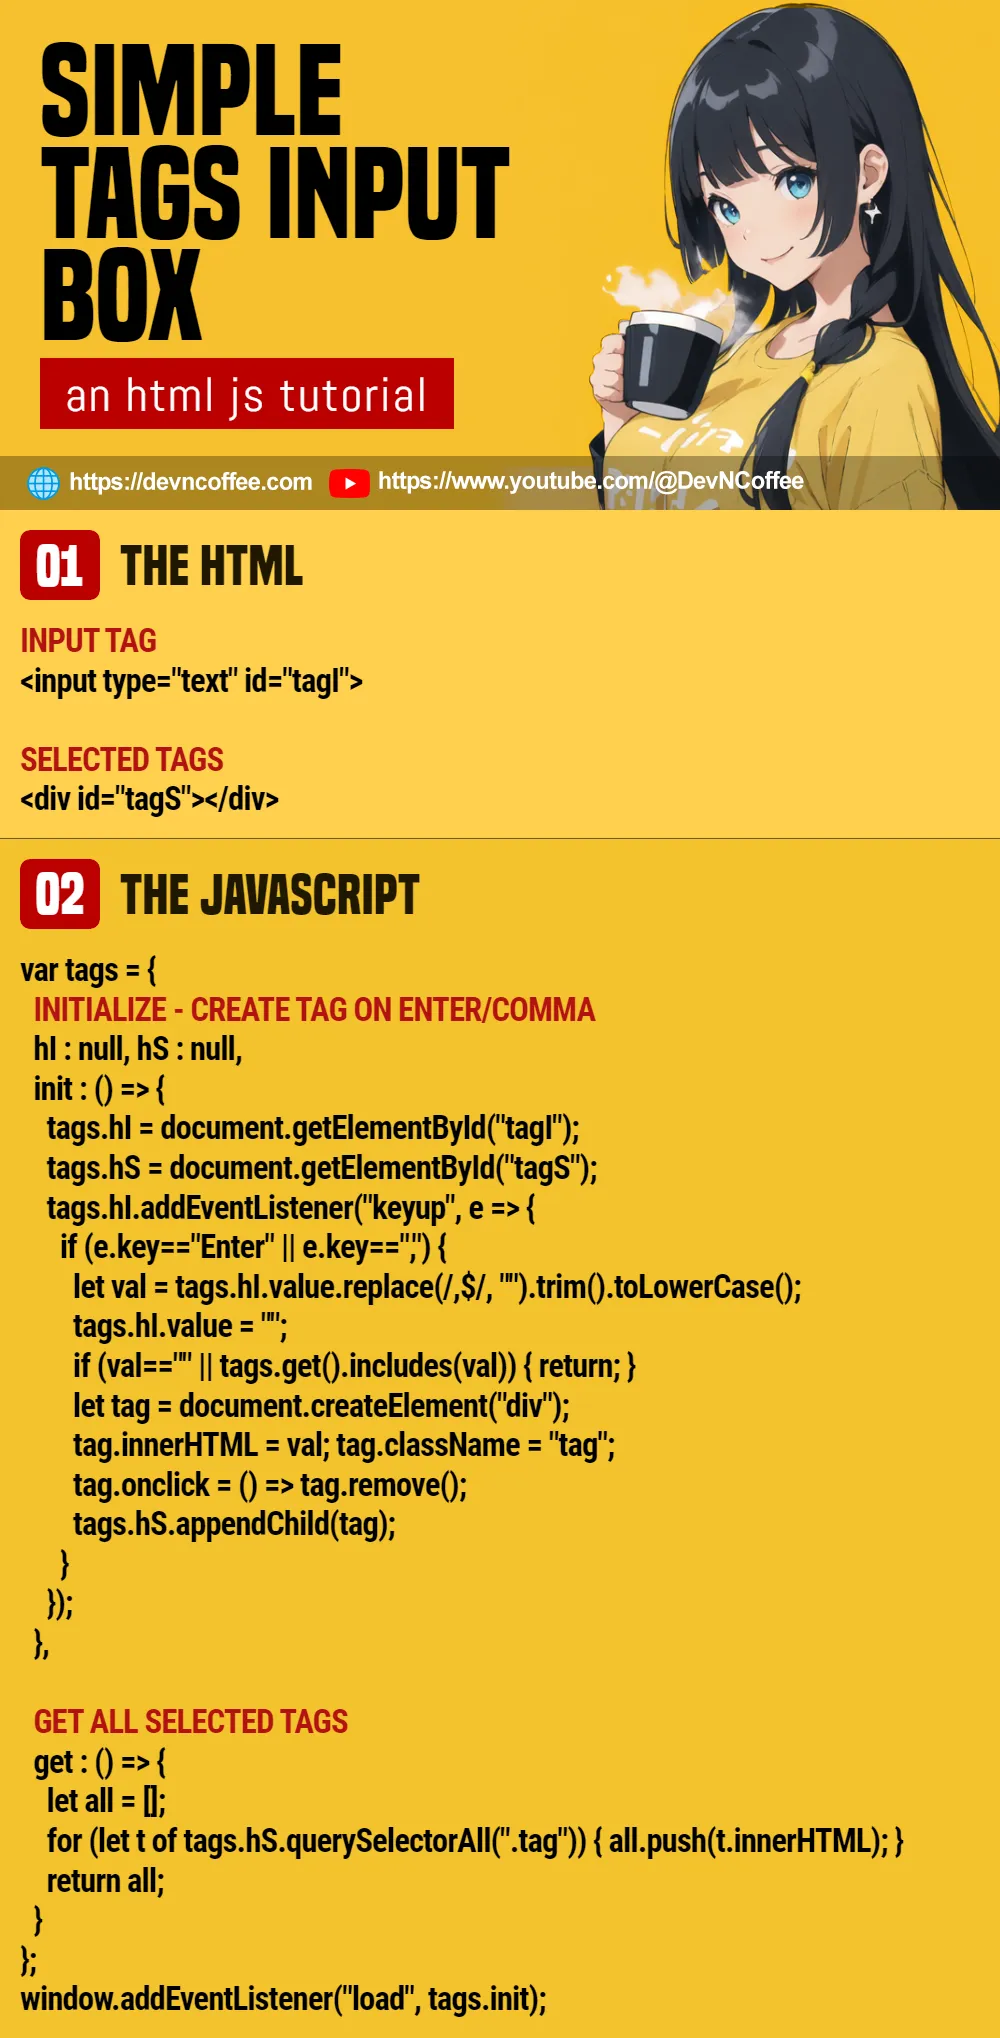
1) THE HTML
<!-- (PART A) INPUT TAG -->
<input type="text" id="tagI">

<!-- (PART B) SELECTED TAGS -->
<div id="tagS"></div>
As simple as it gets.
<input type="text" id="tagI">Text box to “enter a tag”.<div id="tagS">Container for “entered tags”.
2) THE JAVASCRIPT
var tags = {
  // (PART A) PROPERTIES
  hI : null, // html input tag
  hS : null, // html selected tags

  // (PART B) INITIALIZE
  init : () => {
    // (B1) GET HTML ELEMENTS
    tags.hI = document.getElementById("tagI");
    tags.hS = document.getElementById("tagS");

    // (B2) CREATE TAG ON ENTER/COMMA
    tags.hI.addEventListener("keyup", e => {
      if (e.key=="Enter" || e.key==",") {
        // (B2-1) CLEAN UP TAG INPUT
        let val = tags.hI.value.replace(/,$/, "").trim().toLowerCase();

        // (B2-2) STOP IF NO TAG INPUT
        tags.hI.value = "";
        if (val=="" || tags.get().includes(val)) { return; }

        // (B2-3) CREATE SELECTED TAG
        let tag = document.createElement("div");
        tag.innerHTML = val;
        tag.className = "tag";
        tag.onclick = () => tag.remove();
        tags.hS.appendChild(tag);
      }
    });
  },

  // (PART C) GET ALL SELECTED TAGS
  get : () => {
    let all = [];
    for (let t of tags.hS.querySelectorAll(".tag")) { all.push(t.innerHTML); }
    return all;
  }
};

// (PART D) START
window.addEventListener("load", tags.init);
Keep calm and trace in this order:
- We create a
var tags = {}object to contain all the mechanics. - (D & B) On window load, call an
init()function.- (B1) Get the HTML input tag and selected tags.
- (B2) When the user hits comma or enter, create a new tag in “selected tags”.
- (B2-1 & B2-2) Of course, make sure that the tag input is “clean” and not “duplicated”.
- (B2-3) Create the HTML tag itself and insert into “selected tags”.
- (C)
get()is a simple helper function to get all the selected tags in an array.
EXTRA) DATALIST SUGGESTIONS
<!-- (PART A) INPUT TAG -->
<input type="text" id="tagI" list="tagD">
<datalist id="tagD">
  <option value="one"></option>
  <option value="two"></option>
  <option value="three"></option>
</datalist>
A quick one for the beginners, you can add a “tag suggestion” by attaching a <datalist> to the tag input.
P.S. You can dynamically load options into the datalist.
THE END – HOW ABOUT CASE SENSITIVE TAGS?
That’s all for this short tutorial and sharing. For those who lazily skipped 40 lines of code and gave up on reading, this “widget” will automatically turn all tags into lower case. If you want to allow “case-sensitive tags”:
- (B2-1) Remove
.toLowerCase(). - (B2-2) Modify the duplicated tags check to –
for (let t of tags.get()) { if (t==val) { return; }}
However, be prepared to deal with all kinds of funky tags such as fork, FORK, Fork forK, FoRk. It will most likely become a “case nightmare” on the server-side and database.
CHEAT SHEET