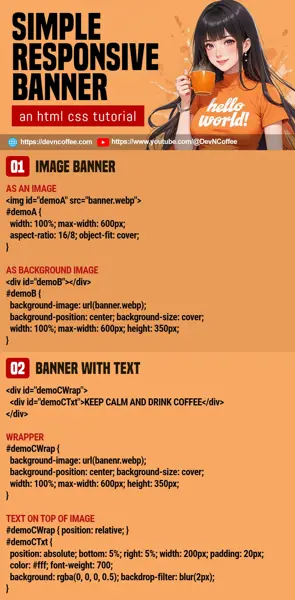
Once upon a time, a student had to add a banner to his project. He decided to do it the “easy way”, to load an entire framework. But when tasked to add text to the banner, he foamed in the mouth. Actually, all you need to know are resizing and positioning. No third-party libraries required. Let Master Coffee walk you through some simple examples, let’s go.
CODE DOWNLOAD
I have released this under the MIT license, feel free to use it in your own project – Personal or commercial. Some form of credits will be nice though. 🙂
VIDEO TUTORIAL
1) IMAGE BANNER
1A) DEMO

1B) THE HTML
<img id="demoA1" src="demo.webp">
<div id="demoA2"></div>
If your banner is a single image, there are 2 ways to do it – Use a good old image tag, or set it as the background image.
1C) HTML CSS
/* (PART A) HTML IMAGE */
#demoA1 {
  /* (A1) 100% WIDTH */
  width: 100%;

  /* (A2) OPTIONAL RESTRICTIONS */
  aspect-ratio: 16/8;
  object-fit: cover;
  max-width: 600px;
}

/* (PART B) AS BACKGROUND IMAGE */
#demoA2 {
  /* (B1) BACKGROUND IMAGE */
  background-image: url(demo.webp);
  background-position: center;
  background-size: cover;

  /* (B2) DIMENSIONS */
  width: 100%; height: 350px;
  max-width: 600px;
}- For a single image:
- Just set
width: 100%, and it will automatically scale to fit. - Optional. We can also set the
aspect-ratio, control the resizing withobject-fit, and restrict themax-width.
- Just set
- As a background image:
- Set the image as the
background-image. - Use
background-positionto control the image position, andbackground-sizeto control the resizing. - Different from the image tag, you need to specify both
width: 100%and aheight. - Optionally, use
max-widthto limit the scaling. - If you don’t want to manually calculate the
height, just swap it withaspect-ratio.
- Set the image as the
2) IMAGE BANNER WITH TEXT
2A) DEMO
KEEP CALM AND DRINK COFFEE
2B) THE HTML
<div id="demoBWrap">
  <div id="demoBTxt">
    <p>KEEP CALM AND DRINK COFFEE</p>
    <a href="https://devncoffee.com">find out more</a>
  </div>
</div>
To add text (or any content) to an image banner:
- Create a
<div id="demoBWrap">wrapper first. - Add a
<div id="demoBTxt">“text layer” inside. - Lastly, add whatever text or content inside the “text layer”.
2C) THE CSS
/* (PART A) WRAPPER */
#demoBWrap {
  /* (A1) BACKGROUND IMAGE */
  background-image: url(demo.webp);
  background-position: center;
  background-size: cover;

  /* (A2) DIMENSIONS */
  width: 100%; height: 350px;
  max-width: 600px;
}

/* (PART B) TEXT */
/* (B1) TEXT ON TOP OF IMAGE */
#demoBWrap { position: relative; }
#demoBTxt { position: absolute; top: 10%; left: 5%; }

/* (B2) COSMETICS */
#demoBTxt {
  width: 200px; padding: 20px;
  background: rgba(0, 0, 0, 0.5);
  backdrop-filter: blur(2px);
}
#demoBTxt p, #demoBTxt a { color: #fff; }
#demoBTxt p {
  font-family: Impact, sans-serif;
  font-size: 24px;
  margin: 0 0 10px 0;
}
Keep calm and look carefully.
- The
<div id="demoBWrap">wrapper is the same as the previous example – Set the image as the background. - Slightly tricky part is to layer the text on top of image –
- Set the wrapper to
position: relativeand the text toposition: absolute. - Use
top bottom left rightto place the text wherever you wish.
- Set the wrapper to
- That’s all. The rest are cosmetics.
3) VIDEO BANNER
3A) THE HTML
<video id="demoC" src="demo.mp4" muted autoplay loop></video>There’s no background-video in CSS at the time of writing, a video tag is the only way to go.
P.S. Take note, the video must be muted for autoplay on page load to work.
3B) THE CSS
/* (PART A) VIDEO BANNER */
#demoC {
  /* (A1) 100% WIDTH */
  width: 100%;

  /* (A2) OPTIONAL RESTRICTIONS */
  max-width: 600px;
  aspect-ratio: 16/8;
  object-fit: cover;
}
Look no further, it’s the same as an image.
4) VIDEO BANNER WITH TEXT
4A) THE HTML
<div id="demoDWrap">
  <div id="demoDTxt">
    <p>KEEP CALM AND DRINK COFFEE</p>
    <a href="https://devncoffee.com">find out more</a>
  </div>
  <video id="demoDVid" src="demo.mp4" muted autoplay loop></video>
</div>
Looks kind of complicated at first, but look closely.
- Create a wrapper
<div id="demoDWrap">. - Add a layer for the text
<div id="demoDTxt">. - Add another layer for the video
<video id="demoDVid">.
4B) THE CSS
/* (PART A) WRAPPER DIMENSIONS */
#demoDWrap {
  width: 100%; height: 350px;
  max-width: 600px;
}

/* (PART B) LAYER TEXT & VIDEO */
#demoDWrap { position: relative; }
#demoDTxt, #demoDVid { position: absolute; }
#demoDTxt { z-index: 2; }
#demoDVid { z-index: 1; }

/* (PART C) VIDEO */
#demoDVid {
  top: 0; left: 0;
  width: 100%; height: 100%;
  object-fit: cover;
}

/* (PART D) TEXT */
/* (D1) POSITION */
#demoDTxt {
  top: 50%; right: 5%;
  transform: translateY(-50%);
}

/* (D2) COSMETICS */
#demoDTxt {
  width: 200px; padding: 20px;
  background: rgba(0, 0, 0, 0.5);
  backdrop-filter: blur(2px);
}
#demoDTxt p, #demoDTxt a { color: #fff; }
#demoDTxt p {
  font-family: Impact, sans-serif;
  font-size: 24px;
  margin: 0 0 10px 0;
}
This is the same idea as the previous image banner, stack the text on top of the video.
- Set the wrapper to
position: relative, both text and video toposition: absolute. - Text is on top
z-index: 2, and video is belowz-index: 1. - Set the video to fill the wrapper with 100% width and height. Use object fit to control the resizing.
- Same mechanics for the text layer. Use
top bottom left rightto place it as required. - That’s about it. The rest are cosmetics.
THE END – BANNER SLIDES
That’s all for this tutorial and sharing. If you need “slides”, check out my other tutorial on responsive slides. Yep, no third-party frameworks. Just pure HTML CSS.
CHEAT SHEET

