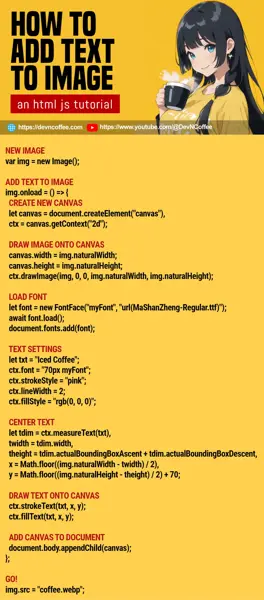
Need to add text to an image in your web app? Yes, it is possible to do so in Javascript, in the browser directly. No third-party frameworks are required. Let Master Coffee walk you through some simple examples, let’s go!
CODE DOWNLOAD
I have released this under the MIT license, feel free to use it in your own project – Personal or commercial. Some form of credits will be nice though. 🙂
VIDEO TUTORIAL
1) SIMPLE ADD TEXT TO IMAGE
// (PART A) NEW IMAGE
var img = new Image();

// (PART B) ADD TEXT TO IMAGE
img.onload = () => {
  // (B1) CREATE NEW CANVAS
  let canvas = document.createElement("canvas"),
  ctx = canvas.getContext("2d");

  // (B2) DRAW IMAGE ONTO CANVAS
  canvas.width = img.naturalWidth;
  canvas.height = img.naturalHeight;
  ctx.drawImage(img, 0, 0, img.naturalWidth, img.naturalHeight);

  // (B3) DRAW TEXT ONTO CANVAS
  ctx.font = "bold 48px Arial";
  ctx.fillStyle = "rgb(0, 0, 0)";
  ctx.fillText("Iced Coffee", 30, 220);

  // (B4) ADD CANVAS TO DOCUMENT
  document.body.appendChild(canvas);
};

// (PART C) GO!
img.src = "coffee.webp";
This is self-explanatory once you trace through:
- (A & C) Create a
new Image()object and set the image source. - (B) Wait for the image to be fully loaded before proceeding.
- (B1) Create a new
<canvas>, and get the 2D context. - (B2) Draw the image onto the
<canvas>first. - (B3) Then, draw the text onto the canvas.
- We set the font with
ctx.font = "bold 48px Arial", this follows the syntax of the CSS font property. - The color of the font is set with
ctx.fillStyle = "rgb(0, 0, 0)". This follows the color value syntax. - Lastly,
ctx.fillText(TEXT, X POSITION, Y POSITION)to write the text.
- We set the font with
- (B4) Output the image. Here, we simply attach the edited image to the page.
- (B1) Create a new
2) STROKE TEXT
// (B3) TEXT SETTINGS
let txt = "Iced Coffee", x = 30, y = 220;
ctx.font = "bold 48px Arial";
ctx.strokeStyle = "cyan";
ctx.lineWidth = 2;
ctx.fillStyle = "rgb(0, 0, 0)";

// (B4) DRAW TEXT ONTO CANVAS
ctx.strokeText(txt, x, y);
ctx.fillText(txt, x, y);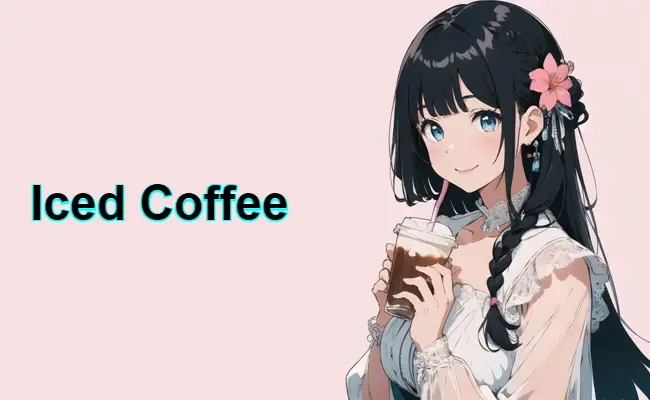
If you need to “outline the text”, just make some minor additions.
- (B3) Define the stroke color with
ctx.strokeStyleand thickness withctx.lineWidth. - (B4) It’s kind of dumb… But we call
ctx.strokeText()to draw the outline first, thenctx.fillText()to draw the text itself.
3) USE A CUSTOM FONT
// (B3) LOAD FONT
let font = new FontFace("myFont", "url(MaShanZheng-Regular.ttf)");
await font.load();
document.fonts.add(font);

// (B4) TEXT SETTINGS
let txt = "Iced Coffee", x = 30, y = 220;
ctx.font = "70px myFont";
ctx.strokeStyle = "pink";
ctx.lineWidth = 2;
ctx.fillStyle = "rgb(0, 0, 0)";

// (B5) DRAW TEXT ONTO CANVAS
ctx.strokeText(txt, x, y);
ctx.fillText(txt, x, y);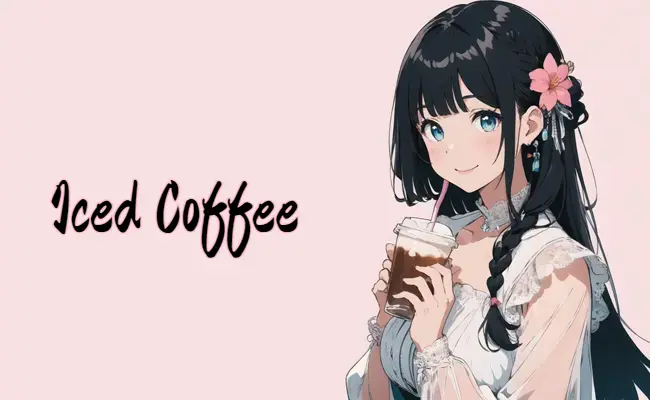
This one got me stumped for a while, but to use a custom font:
- Create a
new FontFace("NAME", "SOURCE")object. - Wait for the font to load.
- Add the font to the document –
document.fonts.add(font).
That’s all. You can now use the custom font, the rest are the same.
4) CENTER TEXT ON IMAGE
// (B5) MEASURE TEXT & CENTER POSITION
let txtdim = ctx.measureText(txt),
    txtwidth = txtdim.width,
    txtheight = txtdim.actualBoundingBoxAscent + txtdim.actualBoundingBoxDescent,
    x = Math.floor((img.naturalWidth - txtwidth) / 2),
    y = Math.floor((img.naturalHeight - txtheight) / 2) + 70;
A little bit of Math is required for those who want to center the text on the image.
- Use
ctx.measureText("TEXT")to get the dimensions of the text box. - To center the text on the image:
x = (IMAGE WIDTH - TEXT BOX WIDTH) ÷ 2y = (IMAGE HEIGHT - TEXT BOX HEIGHT) ÷ 2 + FONT SIZE
5) WRITING MULTIPLE LINES OF TEXT
// (B4) TEXT SETTINGS
let txt = ["Keep Coding", "And", "Drink Coffee"], x = 30, y = 160;
ctx.font = "70px myFont";
ctx.strokeStyle = "pink";
ctx.lineWidth = 2;
ctx.fillStyle = "rgb(0, 0, 0)";

// (B5) DRAW TEXT ONTO CANVAS
for (let t of txt) {
  ctx.strokeText(t, x, y);
  ctx.fillText(t, x, y);
  y += 70;
}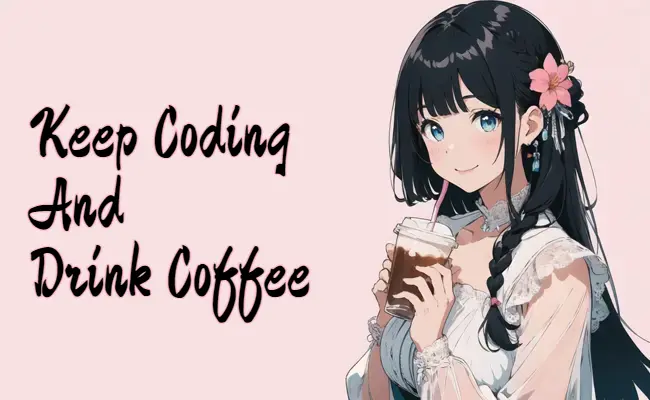
Unfortunately, there are no functions to write multiple lines of text at the time of writing. The only way is to:
- Break your text into many lines, into an array.
- Define the “starting x and y” position.
- Loop through the array of text, and manually shift the y position on every new line.
THE END – RESIZE, FILE PICKER, UPLOAD, DOWNLOAD
That’s all for this short tutorial and sharing. But before we end, Master Coffee can sense more questions from the students. Yes, we can also:
- Resize the image using the canvas.
- Directly read an image file from a file picker.
- Force download the edited image.
- Upload the edited image to the server.
If you want to do any of those, check out my other guide on resizing images in Javascript.
CHEAT SHEET
