Those “professional customer queue systems” are so expensive. You will have to pay for an outdated computer, number display, lousy speakers, and a push button. Well, not anymore. Here is a simple web app that Master Coffee made, that can pretty much turn any device into a queue system. Let’s go.
CODE DOWNLOAD
I have released this under the MIT license, feel free to use it in your own project – Personal or commercial. Some form of credits will be nice though. 🙂
VIDEO TUTORIAL
CUSTOMER QUEUE DEMO
Click on “total queue” to issue a queue number, then click on “currently serving” to advance the queue.
PART 1) THE HTML
<!-- (PART A) CURRENT CUSTOMER -->
<div id="qNow">
  <div class="num">0</div>
  <div class="txt">Currently Serving</div>
</div>

<!-- (PART B) TOTAL CUSTOMERS -->
<div id="qAll">
  <div class="num">0</div>
  <div class="txt">Total Queue</div>
</div>
There are 2 parts to the HTML, these should be self-explanatory.
- Currently serving customer queue number.
- Total number of customers in the queue.
PART 2) THE JAVASCRIPT
var queue = {
  // (PART A) PROPERTIES
  hNow : null, // html current customer
  hAll : null, // html all customers
  notify : null, // notification sound

  // (PART B) INIT
  init : () => {
    // (B1) GET HTML ELEMENTS
    queue.hAll = document.querySelector("#qAll .num");
    queue.hNow = document.querySelector("#qNow .num");

    // (B2) NOTIFICATION SOUND
    queue.notify = new Audio("notify.mp3");
    queue.notify.oncanplay = () => {
      document.getElementById("qAll").onclick = queue.add;
      document.getElementById("qNow").onclick = queue.next;
    };
  },

  // (PART C) ADD TO QUEUE
  add : () => queue.hAll.innerHTML = +queue.hAll.innerHTML + 1,

  // (PART D) NEXT CUSTOMER
  next : () => {
    // (D1) GET ALL + CURRENT CUSTOMER
    let now = +queue.hNow.innerHTML,
    all = +queue.hAll.innerHTML;

    // (D2) PROCEED TO NEXT CUSTOMER
    if (now < all) {
      queue.hNow.innerHTML = now + 1;
      queue.notify.pause();
      queue.notify.currentTime = 0;
      queue.notify.play();
      document.body.animate(
        [{ background: "#000" }, { background: "#f00" }],
        { duration: 300, iterations: 2, direction: "reverse" }
      );
    }
  }
};

// (PART E) ON PAGE LOAD
window.addEventListener("load", queue.init);
This can be intimidating for some beginners, but keep calm and drink coffee. It’s very straightforward once you trace through:
- (E & B) On window load, we call
queue.init()to initialize the queue web app.- (B1) Get the HTML “currently serving” and “total number”.
- (B2) Load the notication sound, enable the queue system when the sound is loaded.
- (C)
queue.add()To issue a queue number, we simply add one to the “total number”. - (D)
queue.next()To move the queue forward, we add one to the “currently serving”. Then, play the notification sound and “flash” the screen.
PART 3) PROGRESSIVE WEB APP
3A) HTML META & CACHE STORAGE
<!-- (PART C) PROGRESSIVE WEB APP -->
<link rel="icon" href="logo.png" type="image/png">
<link rel="manifest" href="manifest.json">
<script>if ("serviceWorker" in navigator) {
  // (C1) REGISTER SERVICE WORKER
  navigator.serviceWorker.register("worker.js", {scope: "/"});

  // (C2) CACHE WEB APP FILES
  caches.open("queue").then(cache => cache.addAll([
    "queue.css", "queue.html", "queue.js",
    "notify.mp3", "logo.png", "manifest.json"
  ]));
}</script>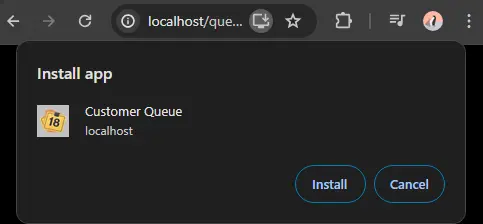
At this stage, we already have a fully functioning queue system. But to turn this into a serverless web app, we need to add a few things into the <head> section.
<link rel="manifest" href="manifest.json">Register a web app manifest file.navigator.serviceWorker.register("worker.js")Register a service worker.caches.open("queue")...Create a storage cache, save all the project files into the browser itself.
3B) MANIFEST FILE
{
  "short_name": "Queue",
  "name": "Customer Queue",
  "icons": [{
    "src": "logo.png",
    "sizes": "512x512",
    "type": "image/png"
  }],
  "start_url": "/queue.html",
  "scope": "/",
  "background_color": "white",
  "theme_color": "white",
  "display": "standalone"
}
What is the “manifest file” used for? As you can see, it pretty much just contains information about the web app – The name, icon, starting URL, colors, etc…
3C) SERVICE WORKER
// (PART A) LOAD FILE FROM CACHE, FALLBACK TO NETWORK IF NOT FOUND
self.addEventListener("fetch", e => e.respondWith(
  caches.match(e.request).then(r => r || fetch(e.request))
));
Lastly, a “service worker” is a script that will run in the background. Remember the storage cache earlier? This service worker “hijacks” the fetch requests, and returns the requested file if it is found in the storage cache. In other words, allow the web app to fully run in “offline mode”.
THE END – ODDS & ENDS
That’s all for this tutorial and sharing. But before we end, here are a couple of “common things” to address:
- Yes, it is possible to print the queue number and give it to the customer. Modify
queue.add():- Open a new window, and “transfer” the total queue number to the new window.
- Print the new window, but the problem with web apps is that it will always show a print dialog.
- No, there is no way to send notifications to customers without the server-side.
- Yes, we can “remember” the queue number, just in case the device crashes.
- Create 2 more variables,
queue.nowandqueue.current. - On adding a new customer, increment
queue.now, save it into thelocalStorage. - On advancing the queue, increment
queue.current, save it into thelocalStorage. - On page load, retrieve
queue.nowandqueue.currentfrom thelocalStorage. - But you will need to find some way to reset/manage the queue number.
- Create 2 more variables,